Saturday, July 29, 2023

Bubble Technique - Totally Techniques Blog Hop


It is time for another Totally Techniques blog hop, and I struggled with this one. This month we are doing the Bubble Technique. It is actually pretty simple, but I could just not get it work and look the way I had envisaged.

Basically, you put some water and detergent in a cup/bowl of water, blow into it with a straw to create bubbles and then you add re-inker to the bubbles. The idea is that the ink kind of stays in the veins of the bubbles. I am not sure if it was because I was using some environmentally friendly detergent, or whether there is a special trick, but my bubbles kept bursting when I added the ink. It was like they were not strong enough to hold the ink. However, I persisted and kept blowing bubbles with the coloured water, and it kind of worked, but ended up with a lot of tiny coloured bubbles which gave some more colour concentrated patterns.


The colours I used were Melon Mambo, Crushed Curry and Highland Heather.

I had originally wanted to use the citrus stamp set, embossing folder and die, but it wasn't working for me, so I had to come up with something else.

I ended up making 2 cards. I used the Balloon stamp set and dies as well as the Zany Zoo stamp set. I have misplaced my dies, so I had to do some fussycutting.... 

First I made the balloon card.


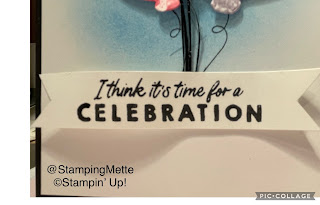
I cut the balloons from the darkest Melon Mambo and Highland Heather bubbled pieces of cardstock. I ink-blended a piece of Basic White cardstock with Azure Afternoon ink and added 2 pink and a purple balloon. For the 2 big balloons I stamped the string, but for the little one I added some skinny pieces of ribbon to add some texture.


I stamped the sentiment and flagged the ends and then curled the piece with my bone folder to create more texture.

Finally, I added some Wink of Stella to the little balloon for some extra sparkle and interest.

It's a very simple card, but I do quite like it.

My second card uses a very lightly coloured Melon Mambo bubbled piece of cardstock. This is actually a piece of Fluid 100 water colour paper, where the others were Basic White.


Being water colour paper, the paper already have some texture and you don't need to add as much extra to create interest on the card.

I stamped the sentiment and the music nodes in Versamark and heat embossed with black embossing powder.

I stamped the singing turtle with Memento Black and coloured him with a selection of green Stampin' Blends - Granny Apple Green, Parakeet Party and Lemon Lime Twist.

I punched a circle out of Basic Black cardstock and trimmed it to create a little stage for the turtle.


I added some Wink of Stella to the top of the microphone and adhered the turtle with Dimensionals. Finally I added some Rhinestones. 

I really like this turtle guy, he is so cute.


So, here are my cards for this month, I had quite a lot of fun with this technique, and I might need to try it again, as it definitely didn't work the way I had intended, but maybe I just need a bit of practice.

The current host code is JCVSWTWQ, make sure to use it to get a little extra from me.

The new Annual Catalogue is now live with lots of beautiful stuff. Make sure to let me know if you would like a copy. 

And don't forget we now also have online exclusive products, these are available while supplies last, so if there is something you really want - don't delay getting it.

If you are in Australia and would like to join my team, you are more than welcome and can choose $235 worth of products for only $169 and don't forget free shipping on starter kits.

Are you interested in a DSP and/or Ribbon share? Let me know and I will explain it all.

Hope you hop along and check out the rest of the hoppers 😄


happy stamping


You are invited to the Inlinkz link party!

Click here to enter

Saturday, July 15, 2023

Double Fan Fold card - Fancy Fold blog hop

It's July and it is time for another Fancy Fold blog hop. This month we are doing the Double Fan Fold card. Which is an easy fold with just the half a piece of card stock and a few score lines. However, you need to be reasonably precise with your scoring, otherwise it won't fold flat. And it does fold flat and fit into a standard envelope.


We are using this easy-to-follow video tutorial by Brenda Quintana.

I started with a piece of 8 1/4 x 5 1/2 Blueberry Bushel card stock and scored on the long side at 1 3/8, 2 3/4, 5 1/2 and 6 7/8. I then scored on the diagonal from the corner to the opposite second scoreline. Both sides at both ends. Then I folded one way on the straight scorelines and the other on the diagonal ones. and you can then make the double fan fold. A bit hard to describe in writing, but easy to follow on Brenda's video.

I used the Bright and Beautiful Designer Series Paper on the side panels. The panels are 2 pieces of 2 1/4 x 5 and I made a light pencil line on the 2 diagonals. I then cut the first cut and could see where I needed to cut on the second. You then cut the top triangle in half through the point.


For the middle (front) panel I cut a piece of 2 1/2 x 5 1/4 Basic White and added a little strip of Blueberry Bushel cardstock about 1/3 up. I cut 2 1" strips of the Designer Series Paper and put it through the Stampin' Cut and Emboss with the long fringe die from the Beautiful Balloons Dies. I added the blue one first and then the green one on top. I finished this little piece off with a piece of Gold and Vanilla Satin Edged ribbon tied in a bow.


I stamped the curved 'Let's get our celebration on' from the Beautiful Balloons Stamp set with Versamark on Blueberry Bushel cardstock and embossed with White Embossing Powder. I then cut it out with the 2 3/8 Circle Punch.

I stamped the little balloon and the balloon strings in Blueberry Bushel and cut out the balloon with the die, and then fussy cut then strings out.

For the larger balloon (medium balloon stamp) I first stamped the bottom in Lemon Lime Twist ink and then top in Blueberry Bushel ink. I then took a sponge dauber and daubed where they 2 inks met to blend the 2 colours before cutting it with the matching die.

I added the balloons to the circle and added it all to the top 2/3 of the Basic White panel.


I painted the balloons with a bit of Wink of Stella and also flicked some Wink of Stella aver the card.

When I am ready to send the card, I will probably cut another 2 1/2 x 5 1/4 panel of Basic White and add to the back for writing on.

This was a fun and easy card to make - it took me less than an hour.


I hope you give this fold a try and hop around to check out the rest of the hop participants. Teresa is next, so hop on over and check out her creation :-)

The current host code is XAHXH22Y, make sure to use it to get a little extra from me.

The new Annual Catalogue is now live with lots of beautiful stuff. Make sure to let me know if you would like a copy. 

And don't forget we now also have online exclusive products, these are available while supplies last, so if there is something you really want - don't delay getting it. We got some new addittions this month, a bit of Christmas with the One Horse Open Sleigh suite and don't miss the Trucking Along Bundle, with the cute truck punch.

If you are in Australia and would like to join my team, you are more than welcome and can choose $235 worth of products for only $169 and don't forget free shipping on starter kits.

Are you interested in a DSP and/or Ribbon share? Let me know and I will explain it all.

Hope you hop along and check out the rest of the hoppers 😄


happy stamping


Saturday, July 1, 2023

Dry Embossing on Vellum - Totally Techniques Blog Hop


It is time for another Totally Techniques blog hop. This month it is dry embossing on vellum. It has been a very long time since I dry embossed on vellum. I generally don't use vellum much, not because I don't like it, but I seem to just forget about it. Vellum is great to add a bit of a softer look and to add as a subtle filler as foliage etc. 

I had a very clear idea of what I wanted to do this month, but it just didn't turn out as I had envisaged. So back to the drawing board.

I still had the Playing in the Rain stampset sitting on my desk from a few weeks ago, and I thought I could come up with something. I remembered the designer series paper that was originally released to coordinate with this stamp set. One of the sheets had a beautiful gray background with raindrops on it. This dsp retired when the last catalogue retired, so I had to come up with something else.

Cue dry embossing on vellum...


First I embossed a piece of vellum with the Raindrops embossing folder. Then I used a blending brush with Balmy Blue ink to add a bit of colour to the back of the vellum before adhering to a piece of Smoky Slate cardstock. As you know you can see most adhesive through vellum so it can be a bit tricky. However, I wanted the vellum to lie flat on the cardstock, so I used a sponge to add liquid glue to the back of the vellum. I smeared it on, so it was a very thin layer and you can't see it at all.

I cut out 3 clouds with the Cloud Punch from Basic White cardstock and stamped the greeting on one of these clouds.


I stamped the bunny from the stamp set in Memento black ink and coloured with Stampin' Blends. A bit of pink for the nose, ears and cheeks. Balmy Blue for the jacket and Smoky Slate for the puddle. It is such a cute bunny.


I finished off the card by added some Wink of Stella to the bunny's nose, ears, cheeks and jacket as well as to the puddle. Then I flicked more Wink of Stella across the whole card to give it a bit interest.

This was a super quick card to make, and I am really happy with it, even if it was not what I originally had in mind.

The current host code is XAHXH22Y, make sure to use it to get a little extra from me.

The new Annual Catalogue is now live with lots of beautiful stuff. Make sure to let me know if you would like a copy. 

And don't forget we now also have online exclusive products, these are available while supplies last, so if there is something you really want - don't delay getting it.

If you are in Australia and would like to join my team, you are more than welcome and can choose $235 worth of products for only $169 and don't forget free shipping on starter kits.

Are you interested in a DSP and/or Ribbon share? Let me know and i will explain it all.

Hope you hop along and check out the rest of the hoppers 😄


happy stamping


You are invited to the Inlinkz link party!

Click here to enter